


NestRecovery Wrap™
$54.99
How to Return to Yourself
Three layers. Four minutes. Full support from day one.
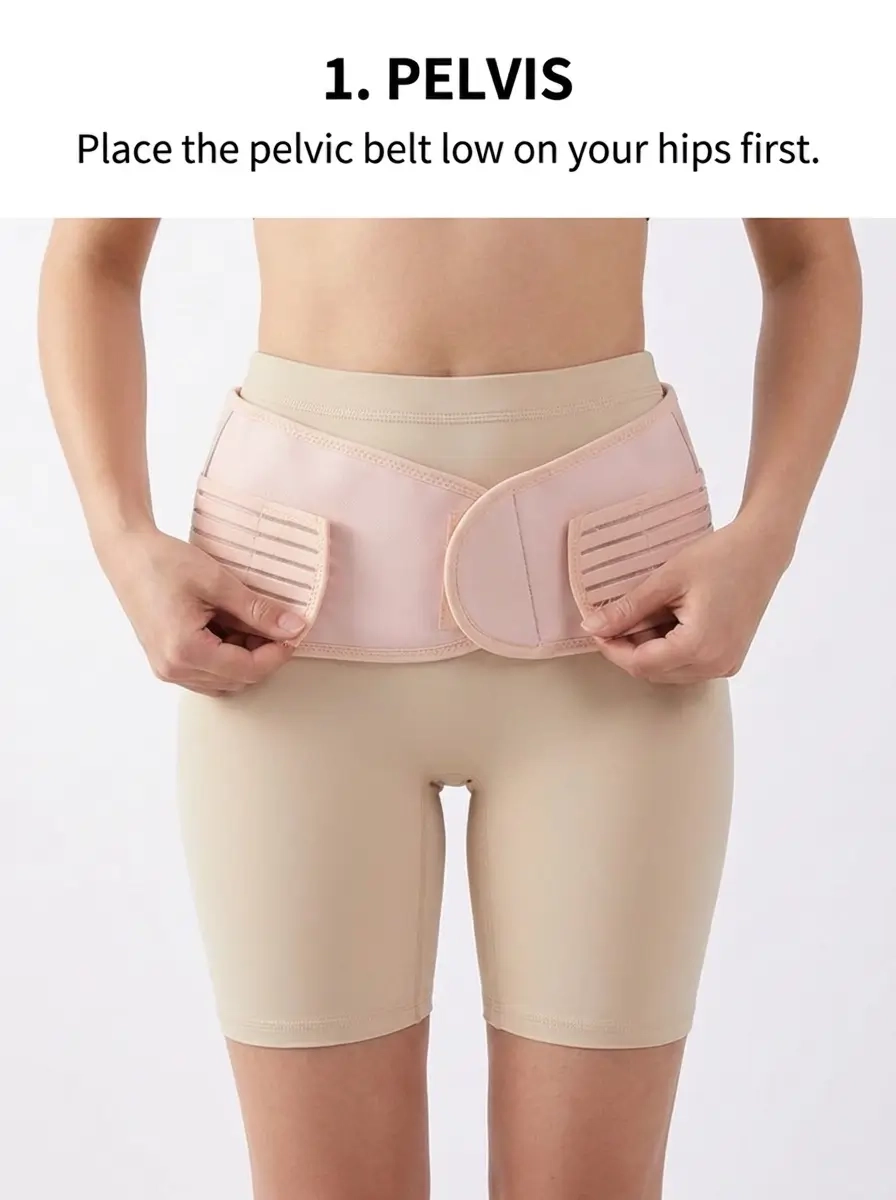
1
Start at the Pelvis
Place the pelvic belt low on your hips first. This is your foundation, everything builds from here.
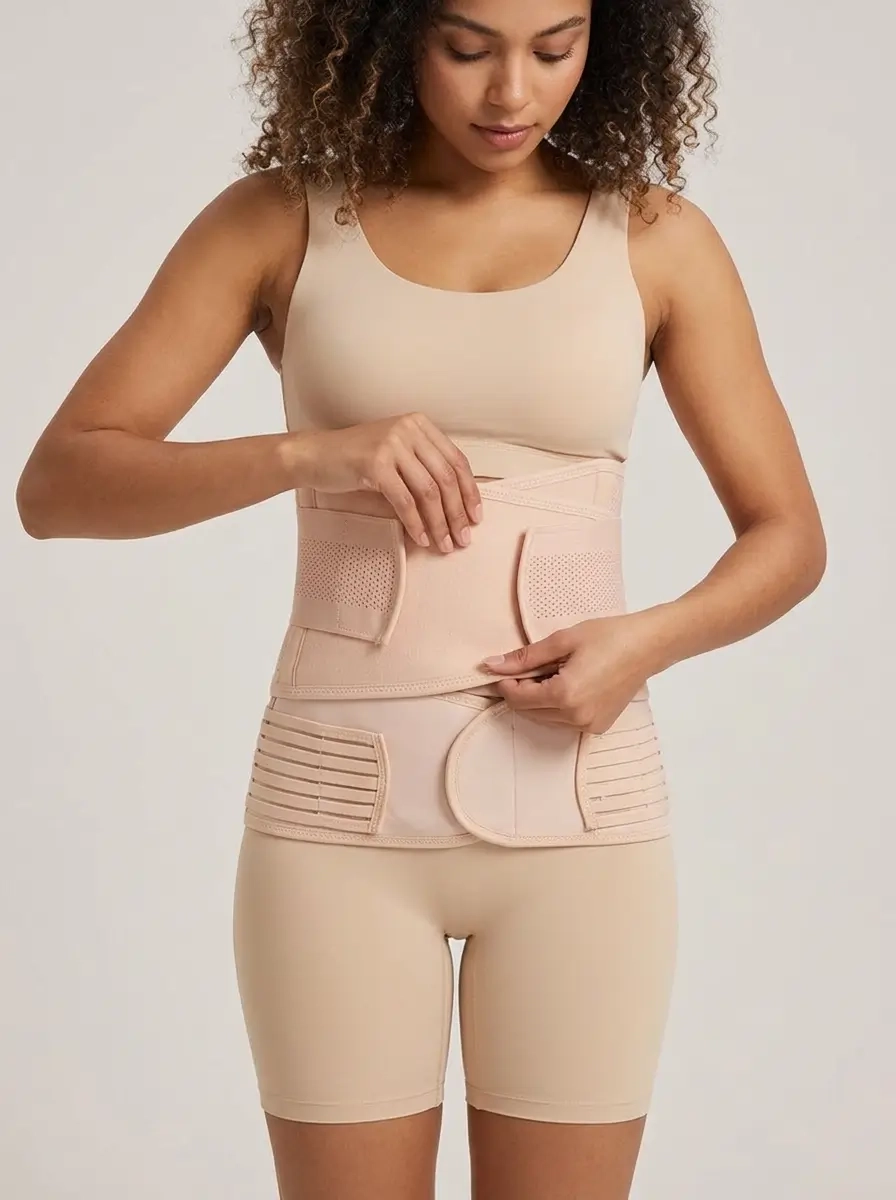
2
Wrap Your Waist
Layer the waist wrap just above the pelvic belt. Feel your midsection begin to settle back toward center.
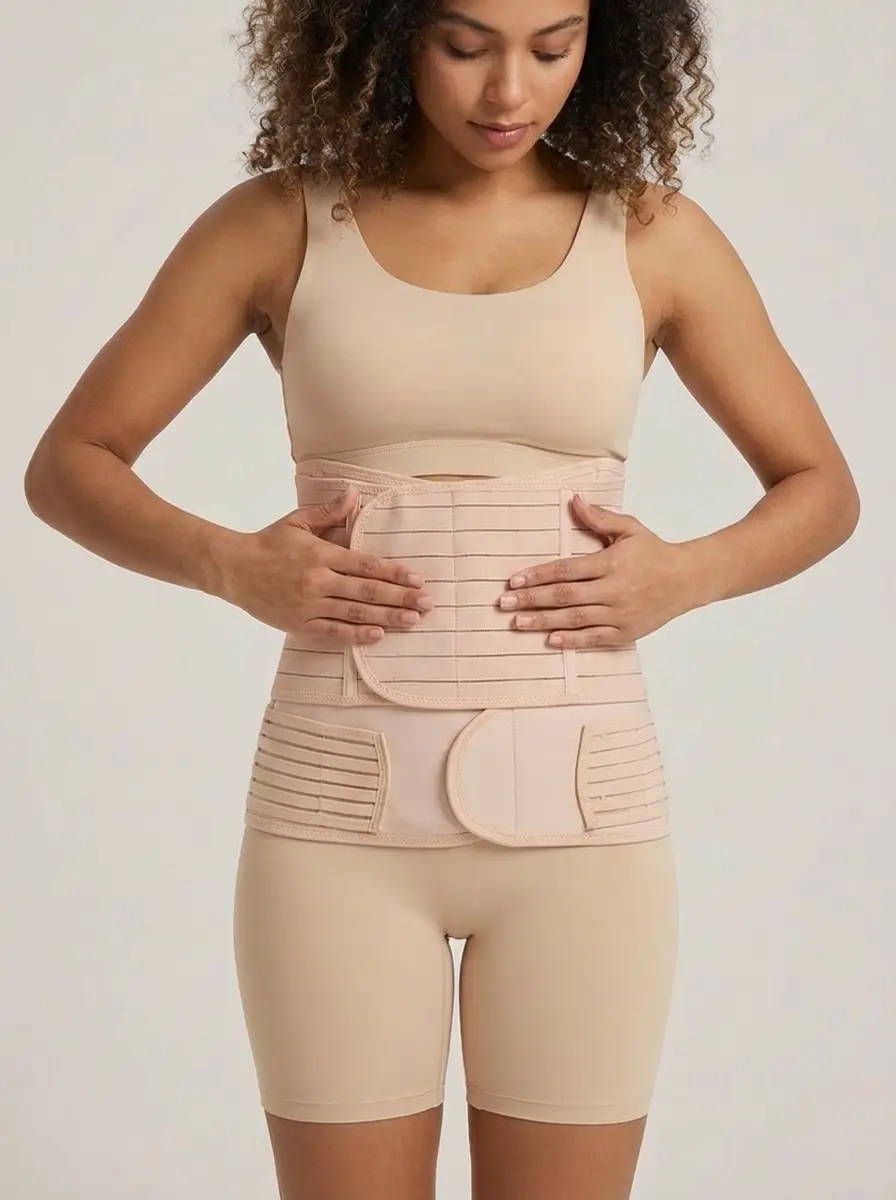
3
Cover Your Core
Secure the stomach band across your full abdominal wall. Smooth it flat. You're almost there.
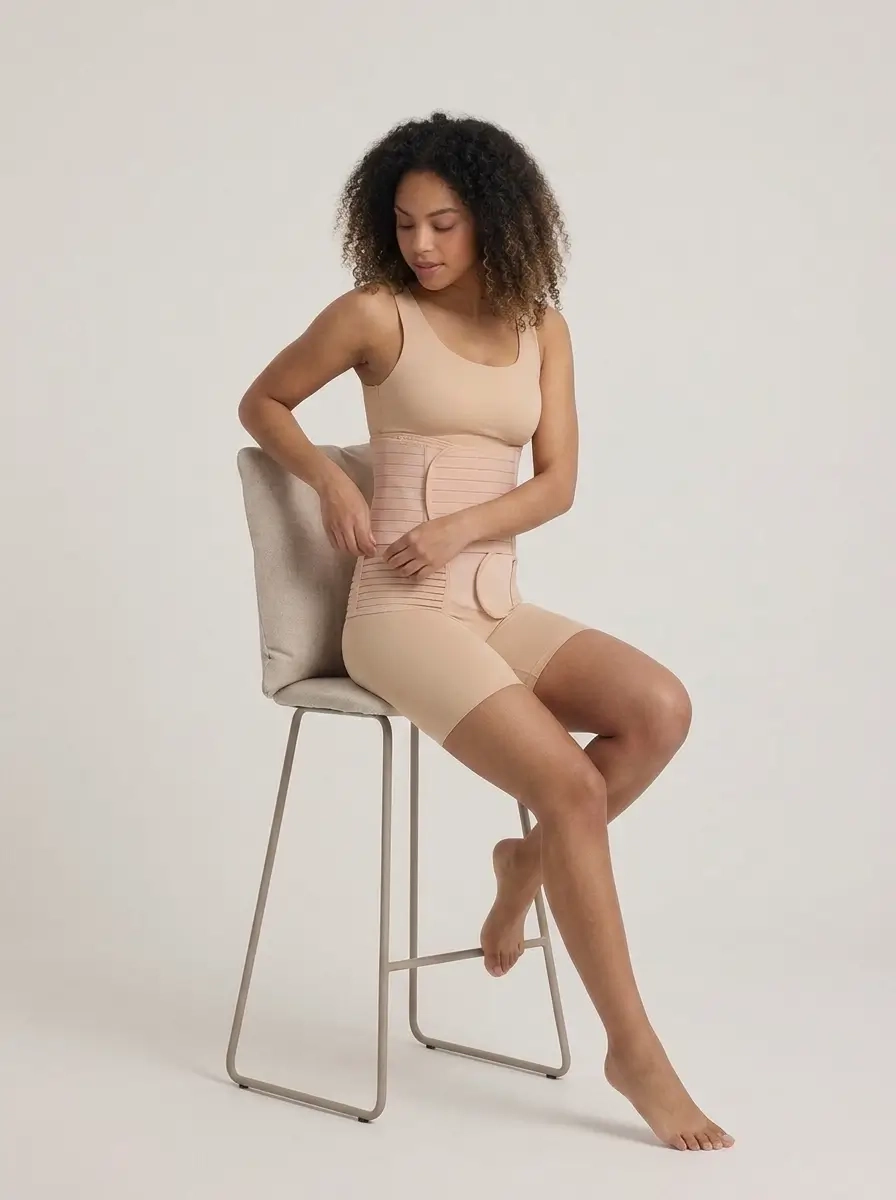
4
Breathe
Sit, stand, move. If everything feels held , not restricted : You're wearing it right. That exhale is the point.
1
Start at the Pelvis
Place the pelvic belt low on your hips first. This is your foundation, everything builds from here.
2
Wrap Your Waist
Layer the waist wrap just above the pelvic belt. Feel your midsection begin to settle back toward center.
3
Cover Your Core
Secure the stomach band across your full abdominal wall. Smooth it flat. You're almost there.
4
Breathe
Sit, stand, move. If everything feels held , not restricted : You're wearing it right. That exhale is the point.
Designed for the Way You Actually Recover
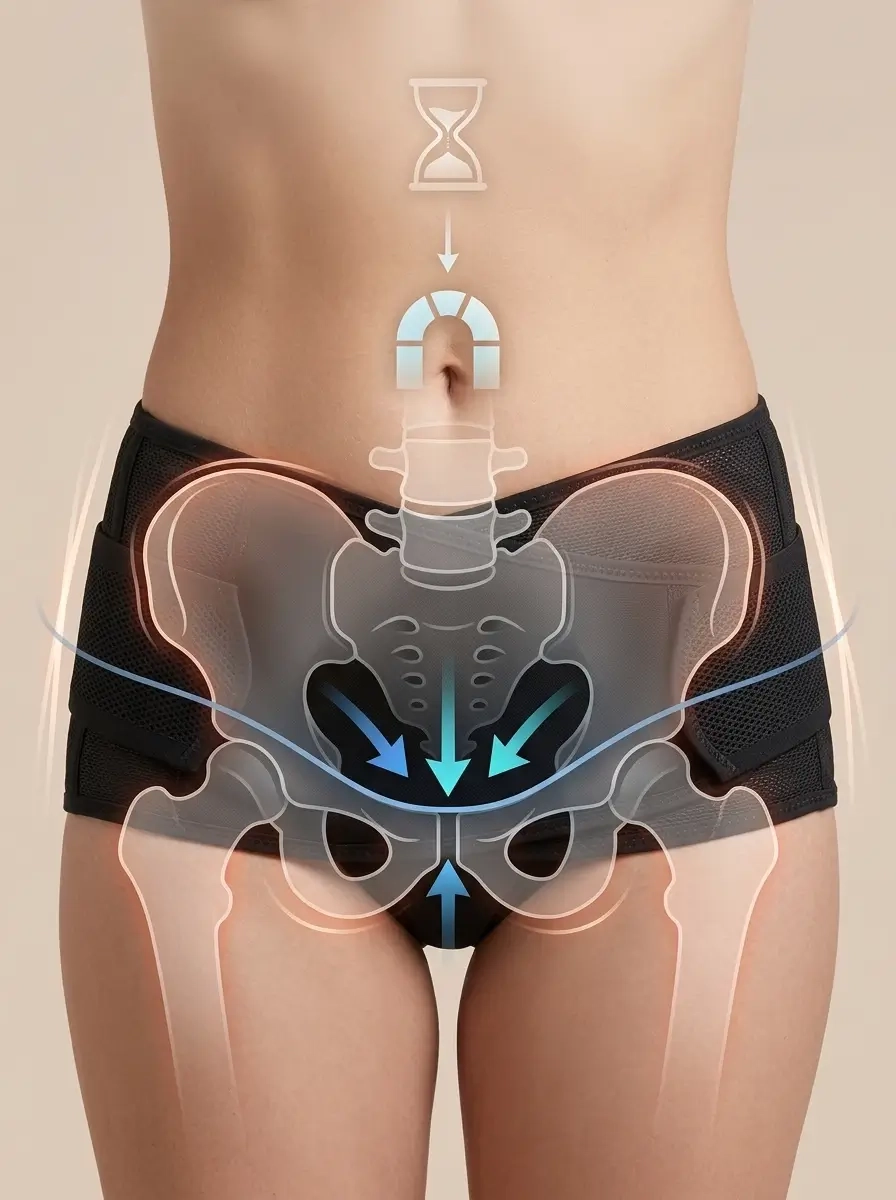
PELVIC
Deep Hip Stability
Your pelvis shifted over nine months. The pelvic belt targets that instability directly: Low on the hips, firm where you feel it most.
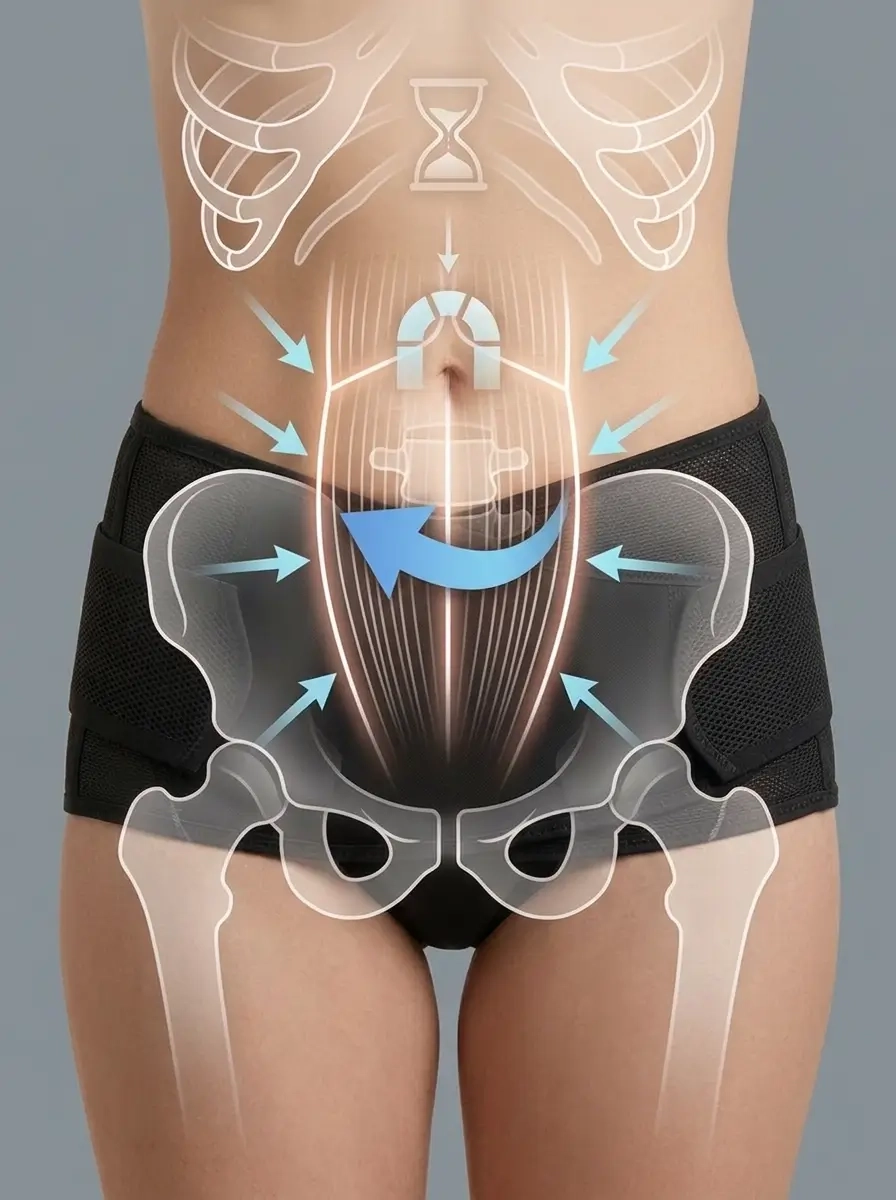
WAIST
Core Reconnection
The waist wrap sits just above the pelvis and begins the process of drawing your midsection back together gently, not aggressively.
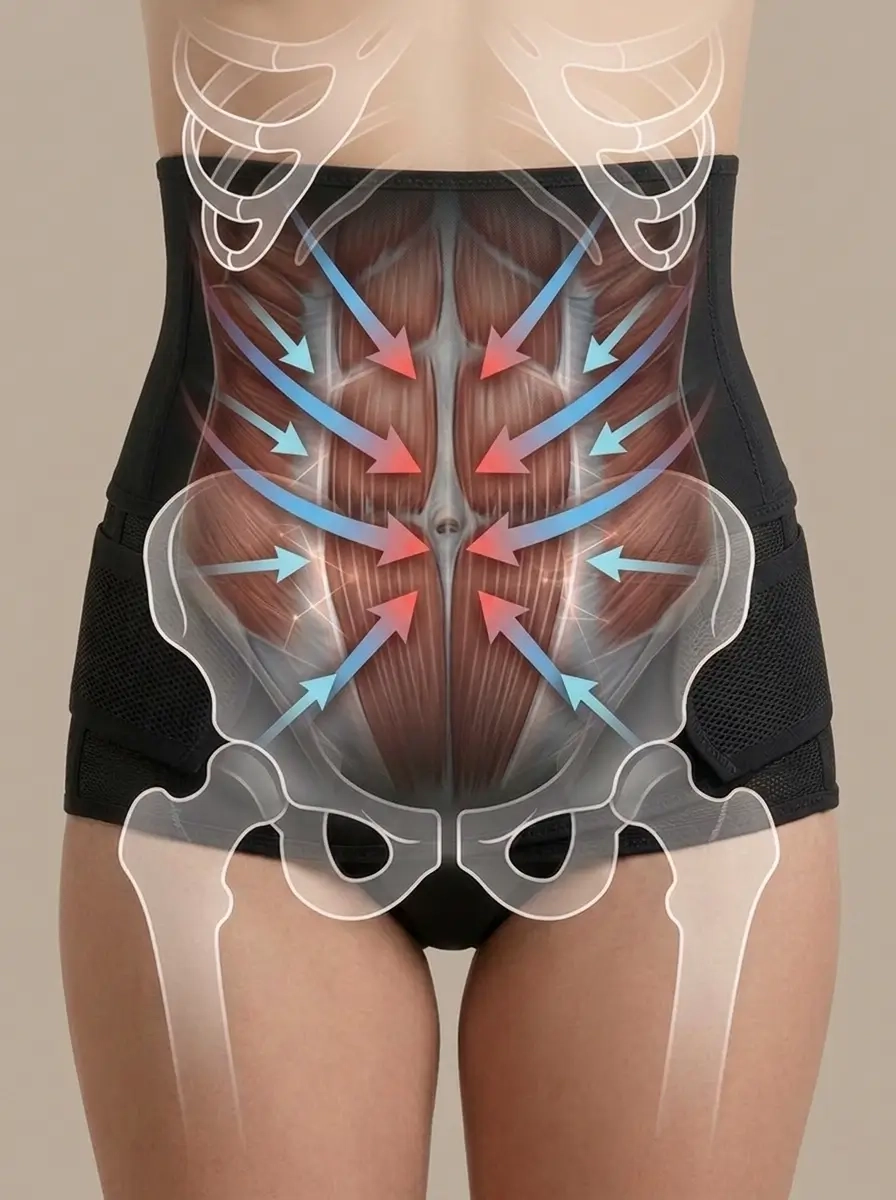
ABDOMEN
Full Wall Coverage
Your upper abdominal wall carried the most load. The stomach band covers it completely - The final layer that makes the system whole.
PELVIC
Deep Hip Stability
Your pelvis shifted over nine months. The pelvic belt targets that instability directly: Low on the hips, firm where you feel it most.
WAIST
Core Reconnection
The waist wrap sits just above the pelvis and begins the process of drawing your midsection back together gently, not aggressively.
ABDOMEN
Full Wall Coverage
Your upper abdominal wall carried the most load. The stomach band covers it completely - The final layer that makes the system whole.
Why One Band Was Never Enough
Generic binders cover one zone, loosely. The
NestRecovery Wrap™
covers all three in the right order.
Get The Full System
NestRecovery Wrap
|
Generic Wrap
|
|
|---|---|---|
| Dedicated pelvic support | ||
| Waist compression layer | ||
| Full abdominal coverage | ||
| Adjustable on all 3 pieces | ||
| C-section safe design | ||
| M–5XL postpartum sizing |
Will this actually help my recovery or is it just compression?
Postpartum support isn't about snapping back. It's about reducing instability while your body does its own work. The NestRecovery Wrap decreases the discomfort of an unsupported core during everyday movement and gently encourages your abdominal muscles to begin reconnecting. The 3-piece layered system targets the areas a single band misses entirely.
How is this different from a regular postpartum belly band?
A standard belly band covers your midsection and stops there. Your pelvis and lower abdomen, the areas that took the most impact, go unsupported. The NestRecovery Wrap is three separate pieces that address three separate recovery zones in sequence. That's not a marketing choice. It's the actual difference between full support and partial coverage.
I had a C-section. Is this safe for me?
Yes, with your provider's guidance on timing. The stomach band can be positioned above the incision line, and the pelvic belt provides lower support without pressure on the surgical site. Many OBs and midwives actively recommend this type of support in early C-section recovery. When in doubt, ask at your first postpartum checkup.
How long should I wear it each day?
Most women wear it during waking hours, especially during movement, feeding, and any activity that engages the core. Some wear the pelvic belt only during rest. There's no fixed rule. Wear it when it helps, remove it when you don't need it. Your body will tell you.
My body is still changing. Will it still fit in a few weeks?
Yes. The hook-and-loop closures on all three pieces adjust as your body changes. Order your delivery size now. If you're between sizes, go up. The system is designed to fit week one and week six.
Can I wear it under clothes?
Yes. The profile is low enough to wear under loose postpartum clothing. The breathable fabric doesn't add bulk or overheat against the skin.
What if it doesn't work for me?
We offer a 30-day money back guarantee. If it's not helping your recovery, contact us at Support@getnestly.co and we'll make it right.
How do I wash it?
Hand wash or gentle machine cycle, cold water. Lay flat to dry. Do not tumble dry. The hook-and-loop closures and elastic fibers hold up best air-dried.